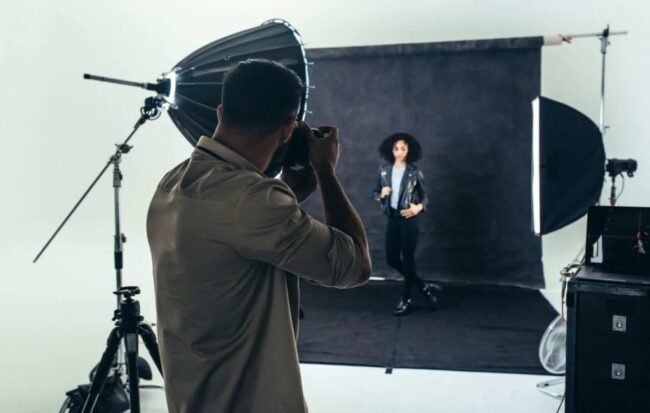
No matter if you’re just starting out as a photographer or if you simply want to up your game and improve the pictures that you create, lighting gear is the most important thing that you should focus on. By utilizing this type of gear in the correct way, you’ll be capable of playing with shadows or you could manage to emphasize a specific part of the subject you’re shooting.
Since you’re reading this article, you most likely want to learn more about how you could properly set up lights in your studio. Fortunately for all individuals that are interested in upping their game, our article below can help! Here is our list of the top five setups that’ll help you with studio photography:
1. There Are 3 Sorts of Positions – Front, Side, And Back
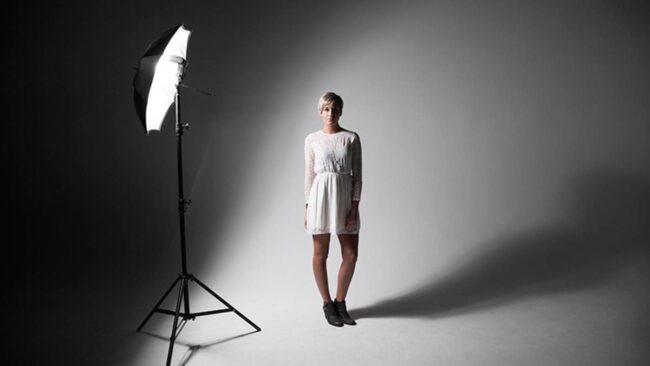
The first thing that you have to learn is that there are 3 sorts of lighting positions that you could utilize – front, side, and back. Front, as the name suggests, means that you need to place the light straight in front of the object of the picture.
By doing so, you’ll be capable of focusing on the details and since the shades will be behind the object, the details will be crystal clear. Next is the side setup, which indicates that the light needs to be set by the side, hence, forming depth and shadows over the object you’re working with.
You must be careful with this position, mostly because you should watch how the shadows fall. The back setup is the most daunting to work with, mostly due to the fact that you must utilize a modifier or manual mode so that you don’t end up shooting a silhouette. Once you figure out how to adjust the backlights properly, you’ll be able to make amazing photos and most subjects/objects will seem like they have a glow around them.
2. Modifiers Go Hand in Hand With Lighting
Yes, in order for you to take amazing pictures, you require lights, however, modifiers go hand in hand with them. By using them, you’ll get the most out of your professional lighting equipment for photography and there are a few of them that you could choose to utilize.
For instance, umbrellas are diffusers that’ll allow you to transmit a ray of light back to the object/person, while a softbox will allow you to form an amazing transition between the shady and bright areas.
Of course, the modifier you opt for utilizing will entirely rely on the lights you decide to use, as well as what you wish to emphasize in the picture you’re taking. Hence, you should do some digging, and learn what modifiers you could opt for using, and from there, you could try out different options so that you learn what effect you could get with them. Since there are so many modifiers out there, you’ll definitely find something that fits your needs.
3. Butterfly Light Setup is The Best For Shooting Products
The butterfly light is the best studio light setup for product photography. You could execute this effect by setting the lights straight in front of the product you’re shooting and adjusting their height, and by doing so, you’ll be capable of forming a shadow directly underneath the object. If you choose this particular setup, you should know that it’ll form hard shadows, hence, you could play around with the lighting in order to see how the shades will appear.
Another thing that could help you with getting this effect is the best lighting setup for studio photography Moman CL60. With it, you’ll be capable of adjusting the color temperatures from 2700K to 6500K and you could also adjust the brightness level that goes from 0 to 100 percent. There are also ten lighting effects and over 40 special modes, hence, you could modify the settings in order for the light to suit the requirements of your shoot.
4. Short And Broad Light Setups Can Do Wonders
The short light effect is, perhaps, the best lighting setup for studio photography, mostly because it’ll allow the item farthest from the device to get the main ray of light. In this setup, the side of the item will receive less light than the side that is away from your device, hence, if you wish to, for example, achieve a thinner face for the individual you’re shooting, you should definitely opt for trying this particular setup.
On the other hand, broad light will achieve a completely different effect than the aforementioned one. The side of the item/person that is facing the camera will receive more light and, in most situations, a lot of people utilize it for photographing portraits of people since it’ll make the item wider. In both setups, you must place the best studio photography lights on the opposite side and by doing this, you’ll fill in the part that has shadows.
5. Use Several Lights For Recording Videos
The best studio lighting setup for video recording is to use several sources of lighting. The multiple strobes will allow you to control every single part of your video, from the rays that’ll fall onto the item to the shadows you’ll get in the end. For instance, if you place two sources on each side of your device, you’ll get soft shades and depth, hence, the end product won’t feature any dark and heavy shadows that could ruin the picture.
Conclusion
Whether you’re just starting out or if you simply want to discover how you could play around with lighting more, the five setups that we mentioned above should be utilized by every photographer out there. The setups will allow you to play around with the beams of light, colors, shades, and effects that you want to get, thus, you should opt for trying them.
Since you’re now well aware of what you must try, you really shouldn’t lose any more of your free time browsing for guides similar to this one, instead, you should open up a new search tab, and start searching for the best beginner studio light kit for photography that’ll do wonders for your business.